To begin at the beginning.
A password hash is a transformation of a password using what we call a “one-way” function. So, for example, ROT-13 (rotate by half the alphabet) would be a very, very bad password hash function and would give fairly recognizable results like “Cnffjbeq123!”. The one-way property means it must be essentially impossible to construct the inverse function and recover the original, and functions like MD5 or SHA1 certainly meet that particular criterion. Iterated encryption functions like DES have also been used (for example LAN Manager hashes), but seem to have fallen out of favor a while ago. There are a load of technical, cryptographic details which neither you or I need to know, but essentially we’ll end up guessing at loads of passwords and then performing the same one-way function and checking to see if we’ve arrived at the correct answer.
Now if we wanted to optimize our guessing procedure, we could create a giant lookup table of all possible passwords and all possible corresponding hashes. (As an aside, this might actually be slower than computing a really fast hash like MD5, because disk access is slower than doing a small number of things in CPU.) So at some point, a long time ago, a thing called a salt was added to the password hash on UNIX systems. A salt is a random number stored along with the hash, which goes into the hash computation as well. This gives two benefits:
- If the salt is long enough and random enough, it is no longer feasible to build a lookup table – it just gets too big.
- You have to attack each hash on its own; i.e. run a separate computation for each (salt, password candidate) pair.
So we arrive at something like sha512crypt, which is many iterations of SHA512 with a large random salt. It is fairly slow to compute each guess, which makes our job harder, for example:
$6$52450745$k5ka2p8bFuSmoVT1tzOyyuaREkkKBcCNqoDKzYiJL9RaE8yMnPgh2XzzF0NDrUhgrcLwg78xs1w5pJiypEdFX/Now, you can attack this by putting it in a file and running John the Ripper (https://www.openwall.com/john/) like this:
D:\john\run> john.exe sha512crypt.txtor with hashcat (https://hashcat.net/hashcat/) like this:
hashcat.exe -a0 -m 1800 D:\hashcrack\john\run\sha512crypt.txt D:\hashcrack\dict\Top95Thousand-probable.txt -r D:\hashcrack\rules\best1222.rule -O -w3So the problem now becomes “just” choosing all the magic parameters, which are explicit with hashcat and implicit with John the Ripper. Because I don’t like typing the same thing over and over again, I wrote a helper script called “hashcrack” (https://github.com/blacktraffic/hashcrack).
Briefly, hashcrack tries to guess the hash type and then runs some sensible attacks based on the speed of the hash. It of course does this by invoking hashcat, John the Ripper, a bunch of conversion/extraction scripts that come with John the Ripper, or occasionally impacket or SQLite. For example, taking a Responder db file (from the test suite) below:
D:\hashcrack>python hashcrack.py -i tests\Responder.db
    Running under win32
    Reading file: D:\hashcrack\tests\Responder.db
    Couldn't parse first line of file - trying as latin1

    [at this point it pulls out the NetNTLMv1 and v2 hashes into .tmp files - "SELECT fullhash FROM responder where type like 'NTLMv2%'" ]

    RUN: hashcat.exe -a0 -m 5600 D:\hashcrack\tests\Responder.db.tmp D:\hashcrack\dict\\\Top95Thousand-probable.txt -r D:\hashcrack\rules\\\best22405.rule  --loopback  -O --bitmap-max=26  -w3  --session hc
    ...
    IEUSER::IEWIN7:ed9cc20456c23e34:939e00dfea66e08e8b...03100000000000000000000000000:Passw0rd!
It is very much a glorified helper script, but it does at least tell you what command it decided to run in case you do need to tweak it further, and it does its best to unpack whatever it is to hashcat format.
First, catch your hash
Obtaining and recognizing hashes and then turning them into the correct format for John the Ripper or hashcat is not always a trivial exercise. At a minimum, we have the following main types.
Windows
- Stored passwords, such as NTLM – How Attackers Dump Active Directory Database Credentials – https://adsecurity.org/?p=2398
- NetLMv1/v2 – These can be captured using Responder or leaked from various applications, if you can get them to connect to your fake SMB share.
- Kerberoasted hashes – These can be captured using Invoke-Kerberoast, Rubeus, or similar to perform Kerberoasting against an AD domain.
- Domain cached credentials – These can be captured using password dumping tools on the local machine or by taking the three registry hives (security, system, and SAM) and unpacking them with impacket’s “secretsdump” (https://github.com/SecureAuthCorp/impacket)
UNIX
For Linux, these would typically be in /etc/shadow and the format will be sha512crypt or bcrypt for modern operating systems, starting with things like “$2$” or “$6$”. For AIX, you might find DEScrypt hashes in /etc/security/passwd, but the common theme is crypt formats (https://www.man7.org/linux/man-pages/man3/crypt.3.html).
Database
Generally, as DBA, you can query the password hashes out of the databases such as PostgreSQL, MySQL, Oracle, MSSQL, etc.
Documents
Password protected ZIP, Word, Excel, PDF files – Various scripts that come with John the Ripper which extract password hashes from these files.
Web Applications
You might see these if you can connect directly to the backend database or if you can exploit SQL injection. This can be anything the developers thought was a good idea, from MD5 to bcrypt. Using the phpass format as an example, it might be something like $P$984478476IagS59wHZvyQMArzfx58u.
Information implied by format
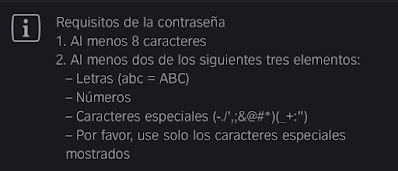
So where you get the hashes from gives you some clues about how to proceed. All Windows hashes should meet the domain’s password policy – unless the admins have given special dispensation. Web or database passwords could be any length in theory. WPA2 passwords must be at least eight characters according to the standard.
For unsalted hashes, such as plain MD5, or NTLM, or SHA1, you can attack a thousand hashes as quickly as one, so you may as well load them all up. Otherwise, you may need to pick hashes of particular interest.
Again with the quicker hashes, you may as well just throw everything at it and see what comes out – you can always refine your approach based on what you crack. With slower ones, it’s worth thinking about it or trying to find “cribs” (potential passwords, or parts of passwords) elsewhere on the system.
Benefits and constraints of using a GPU
You can of course do this all on CPU if you want, but for most hash types, GPU is much quicker. For example, bcrypt can be quicker on CPU because it has been designed that way. I’m not going to talk about FPGAs here, but that is a good approach if you really need it (e.g. https://www.usenix.org/system/files/conference/woot14/woot14-malvoni.pdf)
Because a lot of people like playing games with nice graphics, fairly cheap parallel processors are readily available. But there are certain limitations on how we can get them to process our workload. For the two most popular password cracking programs, hashcat and John the Ripper, this means expressing the search space in terms of a dictionary and a set of rules (or transformations) or a mask, which is essentially a set of possible character values to search. For the faster hashes, like NTLM and SHA1, you will need to supply a list of rules and a big enough wordlist in order to keep the GPU busy – I gather this is something to do with how quickly you can send data over the bus, but whatever the reason, using a short wordlist and no rules will not make best use of the GPU (hashcat will warn you about this).
Meanwhile, mask attacks are quick if you give a sufficiently large search space.
Hashcat expresses masks in a slightly odd way, so we have ?a, representing all ASCII values, ?d representing digits, ?l and ?u being lower- and upper-case respectively, and ?s meaning special characters. You may also see ?b which means any byte.
Thus a search using ?u?l?l?l?l?l?l?l?s will eventually match Password!, but will also catch everything from Aaaaaaaa! through to Zzzzzzzzz}
In the same way, the rules language describes how to transform a base word into the final guess, in terms of deleting or swapping characters or adding them to the start or end of the word. Like a CPU, it only implements a finite set of common operations, and we have to work with what’s there. If we assume “password” is the base:
$1$2$3 means append 123, so we get password123
^3^2^1 means prepend 123 (because we prepend 3, then prepend 2 to “3password”, etc.)
so0 means swap ALL ‘o’ characters to ‘0’ (zero), so it becomes “passw0rd”
One of the limitations of hashcat is that we can’t just swap some of the o characters to 0s, it’s all or none. (Research shows that humans tend to add complexity to the end of passwords, so suffixes are more likely to be helpful than prefixes.)
Dictionary and Rules
A “normal” run of hashcat might look like this, where we have a dictionary of common passwords in decreasing order of frequency and a rules file. I have given the hashcrack command, and the “RUN: ” is exactly how it decides to run hashcat.
The file I’m running it against is the last couple of million of the Have I Been Pwned NTLM dataset (https://www.troyhunt.com/pwned-passwords-now-as-ntlm-hashes/). I’ve written elsewhere about cracking the first 500 million, but for now, it’s just some convenient test data.
 ./hashcrack.py -i hashes.txt -t ntlm -d /root/dict/Top2Billion_probable.txt -r rules/InsidePro-PasswordsPro.rule
    RUN: ./hashcat64.bin -a0 -m 1000 hashes.txt /root/dict/Top2Billion_probable.txt -r /root/hashcrack/rules/InsidePro-PasswordsPro.rule  --loopback -O  -w4
If we look at the debug file produced by doing –debug-mode=4 –debug-file=dbg.log, we can see the dictionary word on the left, the rules applied in the middle, and the thing we found on the right.

We can give a directory as the dictionary argument, which means it tries every file in the directory one after the other. And we can give two rule parameters, which means it combines each rule in the first with every rule in the second. This means it gets big fast, but this can be useful if you have orthogonal rulesets (e.g. one for dealing with passphrases and one for endings like “123”, “123!” etc.). Combining insertions.rule and a normal ruleset got me t++19882008 with the t coming from the normal rules, and the ++ coming from insertions.rule.

Masks and Maskfiles
You can specify a search space using masks. For example, the following will try all ASCII passwords of length 1-5:
 ./hashcrack.py -i hashes.txt -t ntlm --mask ?a?a?a?a?a?a
    RUN: ./hashcat64.bin -a3 -m 1000 hashes.txt ?a?a?a?a?a?a -i  -O   -w4
You can also specify this in a file, where you can define the character classes ?1, ?2, ?3, ?4 and then use them in the final field of the line. The following will search through default passwords and variants:

And then it will try each one, with the custom charsets given:
$ ./hashcrack.py -i hashes.txt -t ntlm --mask maskfiles/defaultpass.hcmask
    RUN: ./hashcat64.bin -a3 -m 1000 hashes.txt /root/hashcrack/maskfiles/defaultpass.hcmask  -O   -w4  --session hc
This guesses things like P@ssword, p@ssword, Password, password, … for example.
Combining lists
But what if I want to make like the Large Hadron Collider and just smash things together and see what happens? Well, there’s mode -a1 in hashcat, combinator and combinator3 from hashcat-utils (https://github.com/hashcat/hashcat-utils), and the PRINCE preprocessor (https://github.com/hashcat/princeprocessor).
Below, the file last1-5.txt contains commonly observed suffixes from my data, but you can also run two password dictionaries against each other. Found passwords will be the concatenation of one entry from the first dictionary and one from the second. In this case, “samtron” is in Top95Thousand-probable.txt and “_r89” is in last1-5.txt.
$ ./hashcrack.py -i hashes.txt -d /root/dict/Top95Thousand-probable.txt -e /root/dict/last1-5.txt -t ntlm
    RUN: ./hashcat64.bin -a1 -m 1000 hashes.txt /root/dict/Top95Thousand-probable.txt /root/dict/last1-5.txt   -O   -w4  --session hc

    8dd1b62216b2703737ad28b59b1bad1d:samtron_r89
    8bdc261caed3145d2a9f4f9de8ab31e2:greentreejkvl
    9e3e0d23ddb9be5a9498b4c9b4366336:ruby@bds
    244e2d25960ca0b8747efd0a1ab3c2f6:shashank.n87
    8c9df56a1769a1d8ed3a43989d25cd6f:conway7o4s
    b35f0b7e18945d4f1e79b6338a51d519:GarfieldH170
    1ff1fdb36d4b3c79cdc5a6d4d01230cb:canuckh2oz
Phrases
I extracted a bunch of short phrases from Google’s n-gram corpus (http://storage.googleapis.com/books/ngrams/books/datasetsv3.html) to play with, but there are other publicly available lists of passphrases. You will need slightly different rules, because you might want to capitalize things after spaces, swap space to underscore, or such. Try https://github.com/initstring/passphrase-wordlist/tree/master/hashcat-rules
  $ python hashcrack.py -i hashes.txt -t ntlm -d c:\Users\jamie\Desktop\words\1-4grams.txt -r rules\passphrases.rule
    RUN: hashcat.exe -a0 -m 1000 D:\hashcrack\hashes.txt c:\Users\jamie\Desktop\words\1-4grams.txt -r D:\hashcrack\rules\passphrases.rule  --loopback  -O --bitmap-max=26  -w3  --session hc

    25d9bebab099e8ef6e0ee0c496a2c917:ambitiouspeople
    f08eacad22f93cf1ad34ad34aaa119e6:industrialwelding
    a820d36ec57c4ef2c4426c242f50248e:simplysatisfied
    5dcbdc8902e458f07bc06eebd8273a6e:WarmFlame
    241d1c802fd187f35b3e2b9789b81b6e:JohnBelfield
    76cdc9d7543af6effda11f8ccef75669:EyeCannot
    17c9ea43a66e21f14a1ed106d06755d4:perhaps_forget
    4c2ba3c55cbdcaf1bc83f94777a3b6dd:imaginative_mind
Markov Models
As with all machine learning/statistical approaches, this works best if your training data is representative of the stuff you’re trying to crack. Which you don’t know, because you haven’t cracked it yet, but it’s a reasonable guess that it might follow the same form as fragments of English text. Travco wrote a nice quick program to do this: https://github.com/travco/rephraser.
In this case, ‘corpus.txt’ should be a lot of English sentences (or from whatever language you think might be in use).
$ python3 ../rephraser/rephraser.py --corpus corpus.txt --model ./wiki1M_model.keyvi | ./hashcat64.bin -a0 -m 1000 hashes.txt -r /root/hashcrack/rules/passphrase.rule -r ../rules/best1222.rule --loopback  -O   -w4

    57871172a2cd8ada7c7794fcb4a1820b:ToStayAtHome07
    def7c2415d3d240ff0c4821858b26402:ToBeReset
    affbfba14f0b54b5f2ff5db1873d3401:AnABootCamp
    33398e1f2542b9b973b5b9a726caf347:TOUNTHEBIG
    50d1e344e7d32c5c354ab8a97119c8c5:Abbyishard
    7efe3e0e20145e33a35d83e07d69e7bc:Andistillmay
Leetification
This is the term I use for swapping things like o->0, s->5, e->3 and so on, as people sometimes do in their passwords, for example “Pa55w0rd”. You can do this in rules if you want to swap all occurrences, but I suspected there might be a lot of people who did not consistently do this. Hashcrack can do this using the -3 flag:
$ ./hashcrack.py -i hashes.txt -3 -t ntlmwhich basically does this:
$ python3 ../scripts/leetify.py /root/dict/Top2Billion_probable.txt | ./hashcat64.bin -a0 -m 1000 hashes.txt -r /root/hashcrack/rules/best22405.rule --loopback -O -w4 --session hcand that script does a recursive leetification process.

Which gets us things like the following, where some, but not all, of the characters have been leetified.

Measuring rule quality
You can use debug output to see how often a rule is firing by adding –debug-mode=4 –debug-file=foo to the hashcat command line.
You can then use this data to count how many times each rule fires and plot a nice graph.
Obviously, this doesn’t account for the fact that two different rules may carry out the same transformation. ^”$” and $”^” both enclosed the candidate password in quotes, but only the first one in your list will get counted with this approach.
Measuring password quality
Another thing we can do is visualize how quickly passwords got cracked with any particular method, using hashcat’s status output and counting the cumulative number of passwords at each “tick.”
 hashcat64.exe -a0 -m 1000 C:\Users\jamie\Desktop\hashcrack\defcon2010-ntlm.txt C:\Users\jamie\Desktop\hashcrack\dict\\\Top32Million-probable.txt -r C:\Users\jamie\Desktop\hashcrack\rules\\\l33tpasspro.rule  --loopback  -O --bitmap-max=26  -w3  --session hc   --status >> graphme

    d:\hashcrack>python graph-by-quality.py hashcat-5.1.0\graphme
This can be used for evaluating the overall strength of the passwords – obviously, a steep initial curve means that lots of things cracked very quickly, and the defenders want to make the graph as flat as possible.
Representation and non-ASCII
If you’re trying to crack non-ASCII characters, you need to know how the underlying system deals with encoding and storage of the non-ASCII characters. For example, if you try to crack the NTLM hash for “Gü” :

Which is ”ü” according to CP-1252, as documented here: https://en.wikipedia.org/wiki/Windows-1252

But if we crack it like this, we get something:

So it appears my DOS window doesn’t like UTF-8:

but it does save it properly in the potfile when viewed with a sensible editor:

For more info, see:
Slower Hashes
Let’s take a look at three different hash types with fairly different designs – NTLM, WordPress (phpass), and bcrypt. Firstly, NTLM is not salted, so we can attack many hashes in parallel for free, which is a truly awful thing for defenders. The other two are salted, meaning each hash needs to be attacked separately, making cracking millions of hashes millions of times harder.
The other main difference is relative speed. Using a 1080 Ti as a reference platform, I can get a speed of 50 billion guesses per second against NTLM, around 8 million against WordPress, and about 20 thousand against bcrypt. However, bcrypt comes with a cost parameter, which can be adjusted to make the hash slower to compute, and the hashcat example is unusually generous in using a cost factor of five. Most modern implementations would use 10 or 12, meaning we can only make about one thousand guesses per second.
The purpose of this cost factor is that defenders want to make the computation take as long as possible without actually annoying the user – so, ideally, it would be a couple of hundred milliseconds or so. As computers get faster, we increase the cost factor and hopefully make things prohibitively expensive for attackers. That is, providing we can stop our users from picking passwords like “Summer2020”.
If you are attacking a hash like bcrypt, you need to start with the most likely passwords and possibly only attack the hashes you think are most useful; remember ,computing one bcrypt guess is 50 million times slower than computing one NTLM guess. Therefore attacking 1000 bcrypt passwords is 50 billion times slower than attacking 1000 NTLM passwords.
Just so you can see what the various hashes look like, here’s a demo of cracking the “hashcat” example WordPress (phpass) hash:
    D:\hashcrack>python hashcrack.py --hash "$P$984478476IagS59wHZvyQMArzfx58u." -d hashcat.txt
    Running under win32
    Reading file: C:\Users\jamie\AppData\Local\Temp\\zc2lxx1b.hash.tmp
    Autodetected phpass
    Cracking hash type 400
    RUN: hashcat.exe -a0 -m 400 C:\Users\jamie\AppData\Local\Temp\\zc2lxx1b.hash.tmp D:\hashcrack\hashcat.txt  --loopback  -O --bitmap-max=26  -w3  --session hc
    ...
    $P$984478476IagS59wHZvyQMArzfx58u.:hashcat
Cracking the “hashcat” example bcrypt hash:
    D:\hashcrack>python hashcrack.py --hash "$2a$05$LhayLxezLhK1LhWvKxCyLOj0j1u.Kj0jZ0pEmm134uzrQlFvQJLF6" -d hashcat.txt
    Reading file: C:\Users\jamie\AppData\Local\Temp\\_kwbmbla.hash.tmp
    Autodetected bcrypt
    Cracking hash type 3200
    Selected rules: best1222.rule, dict Top95Thousand-probable.txt, inc 0
    Using dict and rules
    CWD: D:\hashcrack\hashcat-5.1.0
    RUN: hashcat.exe -a0 -m 3200 C:\Users\jamie\AppData\Local\Temp\\_kwbmbla.hash.tmp D:\hashcrack\hashcat.txt -r D:\hashcrack\rules\\\best1222.rule  --loopback  -O --bitmap-max=26  -w3  --session hc
    $2a$05$LhayLxezLhK1LhWvKxCyLOj0j1u.Kj0jZ0pEmm134uzrQlFvQJLF6:hashcat
And then, an example of a more realistic bcrypt hash with significantly slower speeds:

Go Forth and Crunch
That is a bit of a whirlwind tour of hashcat and how to use it, together with various other add-ons. For further advice I’d say:
- NVIDIA 1080/2080 gives a reasonable bang for your buck right now.
- Learn the main modes and how you can use them to build the password guesses you’re thinking of.
- Think of various hypotheses for what passwords might look like and test them out.
- Make use of cribs such as company name, location, current season, current year, and things like that.
- Cool your rig adequately.
- Have fun.
References
- Example hashcat hashes for each type: https://hashcat.net/wiki/doku.php?id=example_hashes
- Description of hashcat rules: https://hashcat.net/wiki/doku.php?id=rule_based_attack
- Hashcat: https://hashcat.net/hashcat/
- Hashcat help forum: https://hashcat.net/forum/
- John the Ripper: https://www.openwall.com/john/
- Hashcrack, my helper script: https://github.com/blacktraffic/hashcrack
which has an accidental name clash with the amazing book: - Hashcrack, 3rd edition: https://www.amazon.co.uk/Hash-Crack-Password-Cracking-Manual/dp/1793458618
- Terahash, makers of shiny hardware: https://terahash.com/#appliances